You’ve Landed in Japan — Now What?
First steps after touchdown: immigration, city transfer, internet, and check-in—made easy.
Waldir Nunez
Japan

You finally landed in Japan! 🎉
You spent months planning, bought the tickets, packed like a pro—and now you’re in the Land of the Rising Sun. Before you sprint off to Tokyo, Kyoto, Osaka (or wherever your heart’s set on), a few smart moves will make the rest of your trip smoother and stress-free. From clearing immigration to getting into the city, activating your transport card, and setting up mobile data—this post covers everything to do right after landing in Japan.
1) Clear Immigration & Customs 🛂
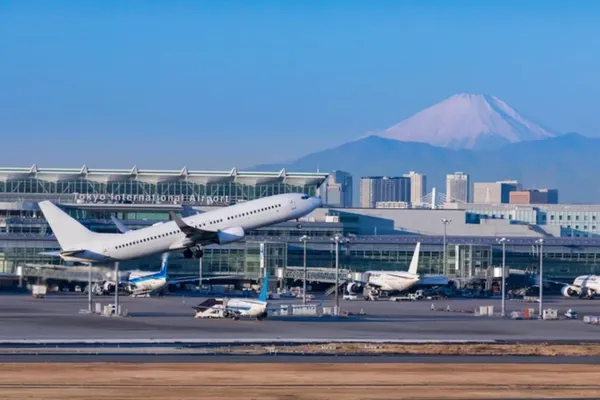
Narita International Airport (NRT) – ~60 km from central Tokyo. Transfer time to the city is typically 1–1.5 hours by train or bus.
Haneda Airport (HND) – Much closer: ~20–30 minutes to central Tokyo. Handles both international and domestic flights; great if you want to hit the city fast.
Immigration (what to expect)
Follow the “Foreign Passports” signs.
Have ready: passport and your immigration form (you’ll get it on the plane or you can complete it digitally via Visit Japan Web to speed things up).
They’ll take a photo and fingerprints.
You’ll receive a stamp or entry slip with your permitted length of stay—keep it safe until departure.
Customs
If you’re carrying restricted items, large amounts of cash, or high-value goods, use the Red Channel and submit the customs declaration.
If not, go through the Green Channel.
Random bag checks can happen—totally routine, usually quick.
Pro tips:
Screenshot or print your hotel name & address in Japanese—it helps with taxis and forms.
Need cash right away? ATMs in the arrival hall (7-Eleven/Japan Post) work with most foreign cards.
Luggage delivery (takkyūbin) counters can ship your suitcase to your hotel so you travel light on trains (super handy if you’re heading into rush hour).
2) Getting from the Airport to Central TOKYO 🚆
From Narita (NRT)
1) Narita Express (NEX) – Fast & comfy
To: Tokyo Station, Shinjuku, Shibuya, Yokohama
Time: ~55 min to Tokyo Station; ~80 min to Shinjuku
Price: ¥3,070 ($20 USD)
Book here: Narita Express on KLOOK
2) Keisei Skyliner – Fastest to Ueno/Nippori
To: Ueno, Nippori
Time: ~40 min
Price: ¥2,570 ($17 USD)
Book here: Keisei Skyliner on KLOOK
3) Airport Limousine Bus – No transfers
To: Major hotels, Shinjuku, Roppongi, Disney Resort
Time: ~90–120 min (traffic dependent)
Price: ¥3,200 ($22 USD)
Book here: Limousine Bus on KLOOK
4) Taxi / Private Transfer – Maximum convenience
To: Anywhere in Tokyo
Time: ~60–90 min
Price: ¥20,000–¥30,000 ($150–$200 USD)
Book: Not required in advance—taxis are available at the terminal (private transfers can be prebooked if you prefer).
When to choose what (Narita):
Shortest total time to Ueno/Asakusa: Skyliner.
Direct to Shinjuku/Shibuya/Yokohama: N’EX.
Door-to-door with luggage: Limousine Bus or Private Transfer.
Late arrival with big bags: Taxi/Private Transfer to avoid transfers.
From Haneda (HND)
1) Tokyo Monorail + JR Yamanote – Fastest combo
To: Hamamatsuchō (connect to JR for Tokyo, Shinjuku, Shibuya)
Time: ~30 min to central areas
Price: ¥500–¥700 ($4–$5 USD)
Book: Not needed—buy on site.
2) Keikyu Line – Budget-friendly alternative
To: Shinagawa (great JR connections), Asakusa area
Time: ~20–30 min
Price: ¥400–¥600 ($3–$4 USD)
Book: Not needed—buy on site.
3) Airport Limousine Bus – No transfers
To: Major hotels, Shinjuku, Disney Resort
Time: ~40–60 min
Price: ¥1,500–¥2,000 ($10–$15 USD)
Book here: Limousine Bus on KLOOK
4) Taxi / Private Transfer – Smoothest with luggage
To: Anywhere in Tokyo
Time: ~30–40 min
Price: ¥8,000–¥12,000 ($60–$90 USD)
Book: Not required in advance (prebook if you like).
Quick pick (Haneda):
Fast & cheap: Monorail or Keikyu.
Hotel drop-off: Limousine Bus.
Late night / lots of luggage / kids: Taxi/Private Transfer.
3) Get Online: eSIM or WiFiBOX 📶
Staying connected from the moment you land is a game-changer—for maps, translations, train times, and check-ins. You’ve got two great options:
Option 1 — eSIM 📱
An eSIM lets you get online instantly—no physical SIM swap, no airport pickup.
Why choose an eSIM?
✅ Instant activation: Buy it before you fly and connect the moment you land.
✅ Keep your number: No need to remove your home SIM—you’ll still receive calls/texts.
✅ Flexible plans: From daily data (e.g., 1GB/day) to truly unlimited.
✅ Nothing to lose: No extra device to carry, charge, or return.
How it works
Purchase your eSIM from a trusted provider.
Scan the QR code you receive by email.
Activate before takeoff or right after landing.
You’re online—no queues, no counters.
Recommended: eSIM Square
Plans from 1GB/day to unlimited data.
Works with most modern phones (iPhone 11+ / Galaxy S20+ and newer).
Solid coverage across Japan on fast 4G/5G networks.
🔗 Buy here: eSIM square
Option 2 — WiFiBOX (Pocket Wi-Fi) 🔌
Traveling with family or friends? A WiFiBOX is perfect—one device, multiple phones/laptops connected.
Why choose WiFiBOX?
✅ Group-friendly: Share with 5–10 devices (model-dependent).
✅ Fast & stable: 4G/5G coverage across Japan.
✅ Great for laptops/tablets: Ideal if you work on the go.
How it works
Reserve online and choose your pickup point.
Pick it up at Narita or Haneda (and other major hubs).
Power it on and connect—done.
Return it at the end (drop-boxes at airports and major stations).
🔗 Reserve with 20% off → WiFiBOX (OFFICIAL)
Heads up: Battery typically lasts 8–12 hours. Bring a power bank if you’ll be out all day. Some “unlimited” plans have fair-use throttling—perfectly fine for maps, social, and streaming in SD.
Which should you choose?
👤 Solo traveler who wants the simplest setup → eSIM (no pickup/return).
👥 Group or multi-device use → WiFiBOX (share one plan across everyone).
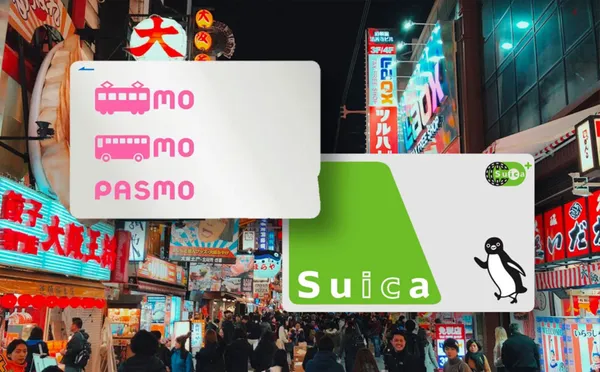
4) Get Your Transit Card (Suica / PASMO) 🚉
Japan’s trains and subways are world-class—but buying single tickets every ride is a hassle. IC cards like Suica and PASMO turn everything into a tap-and-go experience.
Why use Suica or PASMO?
✅ Faster boarding: Tap in/out—no more ticket machines.
✅ Works almost everywhere: Trains, subways, buses, vending machines, and convenience stores.
✅ Easy top-up: Recharge at stations or konbini (7-Eleven, FamilyMart, Lawson).
✅ Digital options: Add to Apple Pay / Google Wallet on compatible phones.
✅ No expiry: Keep it for your next Japan trip.
Where to get one
Physical card in Japan:
Ticket machines at most JR/subway stations
Major stations (Tokyo, Shinjuku, Ueno, etc.) and some convenience stores
Initial cost: ¥500 deposit + whatever balance you load
Digital card (before you fly):
Add Suica or PASMO to Apple Pay / Google Wallet (device and card compatibility varies by region/bank).
Top up in-app or with cash at machines once in Japan.
Tourist picks: Welcome Suica (no deposit; time-limited) and PASMO Passport—easy to get, perfect for short trips.
Pro tip: Keep your phone and physical IC card separate when tapping—two cards together can fail to read.
5) Get Cash or Exchange Money in Japan 💴
Japan is modern and cashless in many areas—but cash is still essential for small restaurants, local markets, rural transport, and some temples/shrines.
Best ways to get yen
1) Withdraw from ATMs (Recommended) 🏧
Usually better rates than currency exchange counters and super convenient.
Where to withdraw:
🏪 7-Eleven ATMs (everywhere, many languages)
📮 Japan Post (JP Bank) ATMs (post offices & some stations)
🏪 Lawson ATMs (convenience stores)
🏦 Major-city bank ATMs (e.g., SMBC) in Tokyo/Osaka
Limits & fees:
Per-withdrawal limits often ¥50,000–¥100,000 (bank/card dependent).
Your bank may charge a foreign ATM fee; the local ATM may add a small fee too.
Always choose “Charge in JPY” and decline DCC (Dynamic Currency Conversion) to avoid bad exchange rates.
Before you fly:
Tell your bank you’ll be in Japan to prevent fraud blocks.
Enable your card for international withdrawals.
Consider bringing a backup card.
2) Currency exchange counters 💱
You’ll find them at airports, big stations, and tourist districts.
Pros:
Start your trip with cash in hand.
No need to use your card abroad.
Cons:
Rates are usually worse than ATMs.
Not all counters are competitive—compare before exchanging.
Where to exchange:
Airports: Narita, Haneda, Kansai (Osaka) have multiple counters.
Tourist hubs: Shinjuku, Akihabara, Namba (Osaka), Gion (Kyoto).
Some large stores and banks also exchange foreign currency.
6) Find Your Hotel & Check In 🏨
Now that you’ve got cash, internet, and your transit card sorted, it’s time to head to your hotel, Airbnb, or ryokan and check in. It sounds simple, but on a first trip to Japan a few smart moves can save you time (and stress).
Japan’s transport is world-class—and a little confusing at first. Do this and you’ll glide through:
Confirm the exact address before leaving the airport. Japanese addresses can be tricky (many streets have no names).
Use Google Maps or Navitime for the best train/subway/bus route.
Check the station exit you need. Big stations can have 10+ exits; the wrong one can mean a long detour.
If your place is in a narrow alley or residential area, preview photos + Street View so you recognize the entrance.
Taxi tip: Show the address in Japanese (screenshot it). If needed: “この住所までお願いします” (Kono jūsho made onegai shimasu) — “Please take me to this address.”
Arriving before check-in?
Most places start check-in around 3:00 PM. If you’re early:
Leave bags at the hotel: Most hotels/hostels will store luggage (often free). Drop it off and come back later to check in.
Station coin lockers: Don’t want to go back? Use station lockers. Sizes vary; prices are about ¥300–¥800 ($2–$6 USD) per day. Many accept Suica/PASMO (IC cards) and cash. Time limits are typically 24–72 hoursdepending on the station.
Explore nearby: Stretch your legs, grab a bite at a konbini (7-Eleven, FamilyMart, Lawson), or visit a nearby sight while you wait.
✅ Airbnb tip: Check if there’s self check-in or ask the host about early bag drop.
Bonus convenience
Luggage delivery (takkyūbin): Ship your suitcase from the airport to your hotel so you can travel light on trains—super useful if you land at rush hour.
Check-out times are often 10:00–11:00 AM. Most places will hold your bags until your later train/flight.
Book Your Stay with a Discount 💸
Still need accommodation? Compare hotels, ryokan, hostels, and apartments in one place with competitive prices.
Use discount code: waldirdesuklook for up to 8% off your booking.
Conclusion: Your Japan Adventure Starts Now 🇯🇵✨
Congrats—you’ve nailed the first steps after landing. From neon-lit nights in Tokyo to temple-hopping in Kyoto, from the freshest sushi to a blissful onsen soak, Japan is packed with experiences waiting for you.
Don’t stress if everything isn’t perfectly on script—that’s part of the fun. Be curious, try new flavors, lean into the culture, and leave room for spontaneity. Japan surprises you at every corner—let it. ✨
Welcome to Japan… now the adventure truly begins! 🚀🏯🍣

Hledáš, co podniknout?
Podívej se na mého průvodce s nejlepšími bezplatnými aktivitami, itineráři a cestovními tipy pro nezapomenutelný výlet.