Sossusvlei masterclass Tips and Tricks
After a thousand visits with the world’s best photographers, here are the insider tips you need to capture Sossusvlei like a pro.
Jandre Germishuizen
Sossusvlei, Namibia

Seasonal Tips:
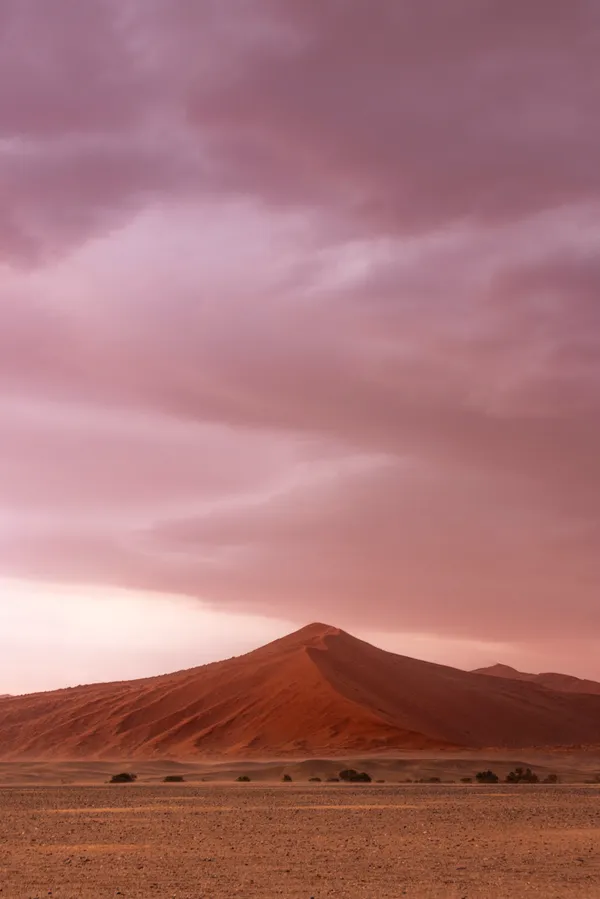
• Summer Magic: In summer, don’t shy away from visiting. The occasional cloud cover adds depth and drama to your dune shots, making every frame more dynamic.
• Winter Clarity: In winter, you’ll often find pristine, clear skies thanks to the coastal southwesterly winds. Look out for that low-lying morning fog that can roll in and create a surreal, almost mystical atmosphere around the dunes.
Where to Stay:
• Lodges: Consider staying at Dead Valley Lodge or Sossus Dune Lodge. Both provide dinner, bed, and breakfast, and they let you enter the park an hour before sunrise and stay an hour after sunset. For photographers, that extra time is essential.
• Campsites: If you prefer camping, Sesriem Campsite and the campsite at Dead Valley Lodge also give you that same early and late access. That’s a big advantage for catching the best light.
Entering the Park & First Light Tips
When you arrive at the park, aim to be there right as the gates open. While many people rush straight to Dead Vlei or Sossusvlei itself, don’t overlook the Tsauchab Valley. It’s one of the most beautiful areas to photograph in the early morning light.
Dune Photography Tip:
For the best detail, start shooting about 10-15 minutes after sunrise so you capture some detail in the dune shadows. The first iconic stop is Three Tree Dune, about 30 km from the gate, easily recognized by the three distinctive trees at its base. Just be there a bit after sunrise for the best results.
Camera Gear for Sossusvlei
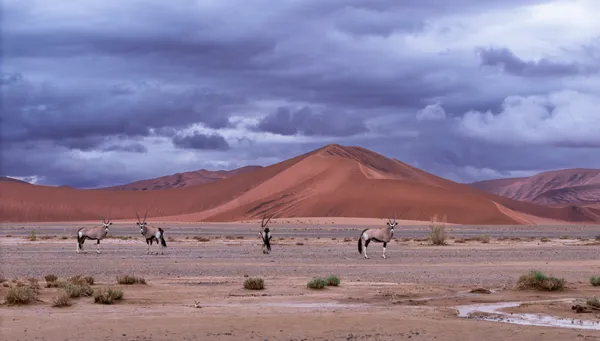
Even though it’s a landscape location, wide-angle lenses are tricky to use because the dunes are both massive and far away. Instead, a mid-range zoom or a telephoto lens is your best friend. You can easily shoot at 800mm and get great results. The 60 km-long Tsauchab Valley has stunning dune spines, beautiful living and dead trees, and occasionally wildlife like springbok or oryx. Using a telephoto lens helps compress these scenes, making the dunes appear closer and more dramatic.
General Movement and Tripod Tips
When visiting Sossusvlei, you’re free to walk around almost anywhere. Feel free to stop by the roadside and position yourself to line up trees and dunes. For this kind of shooting, a telephoto lens is key, but even more important is a sturdy tripod.
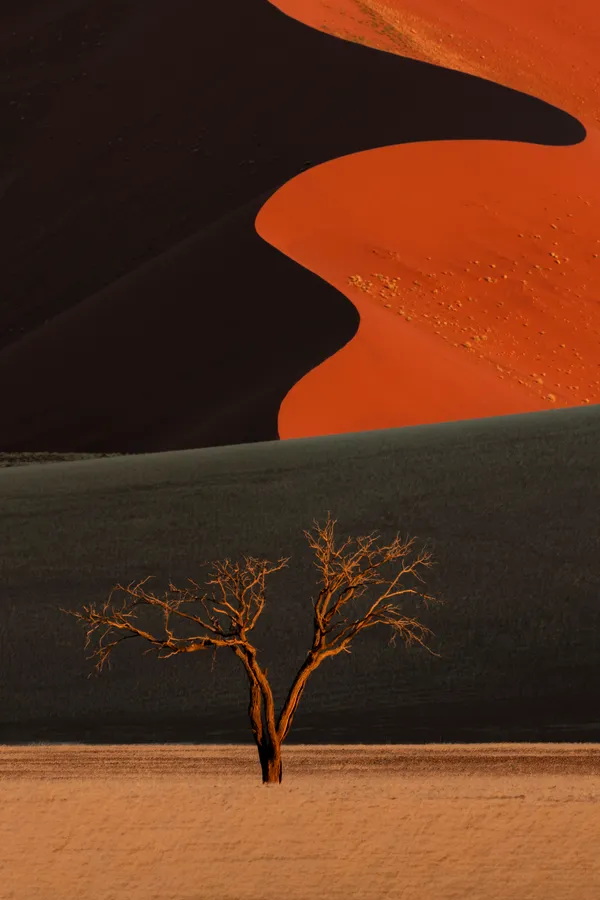
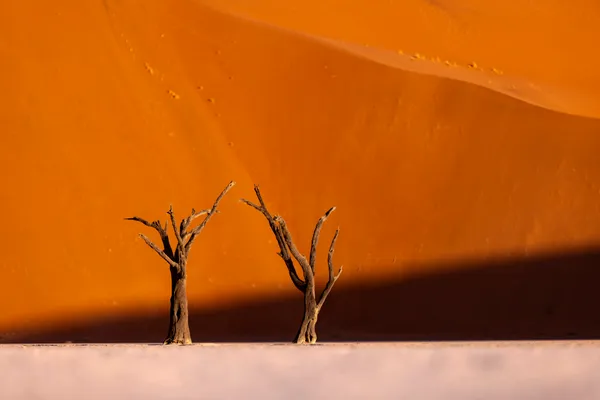
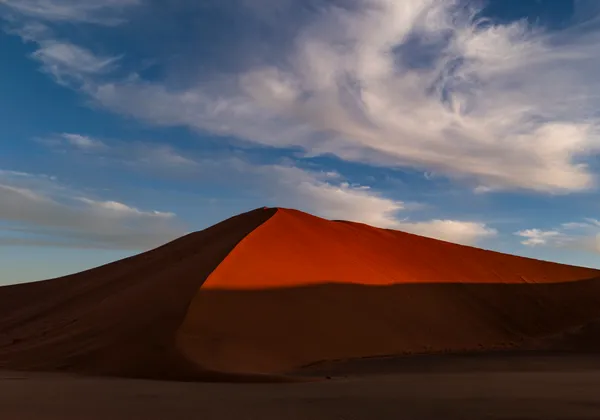
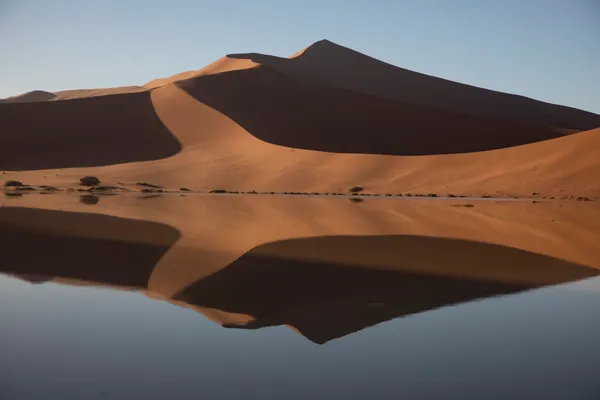
Dune Stop: The Squiggle Dune
This dune is easy to spot on your left as you drive in. It’s famous for its distinctive “squiggle” shape and a beautifully shaped tree right below it. The best time to photograph this dune and the tree is about 30 minutes before sunset. That way, the sun lights up the western side of the dune and the grass valley behind the tree, giving you a perfect shot of the tree in full light and the dune in shadow.
Photographing the Squiggle Dune:
After you park, walk about 200 meters towards the dune to get a better perspective. Use a telephoto lens (400mm or longer) to compress the tree and the dune together in your shot. This will make the tree appear larger and more dramatic against the dune backdrop.
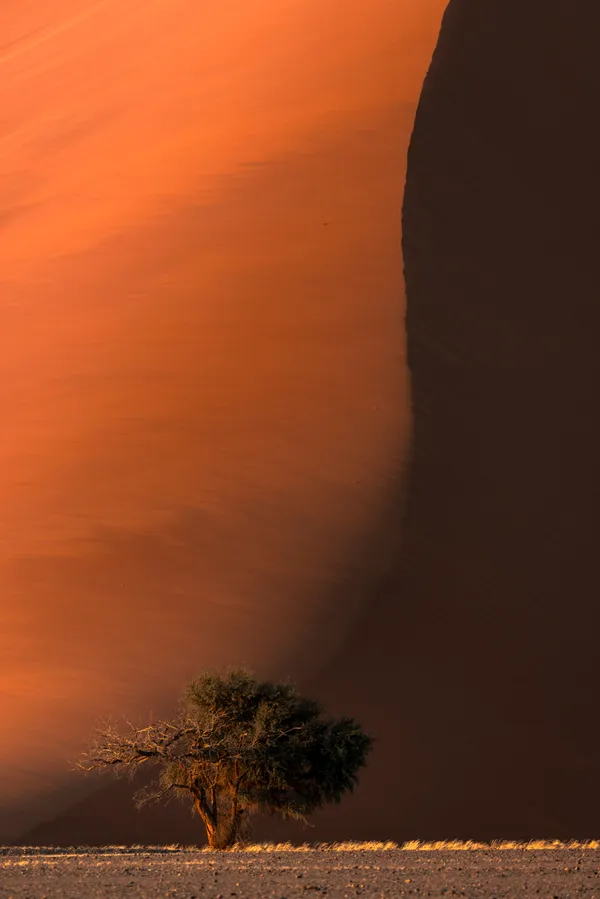
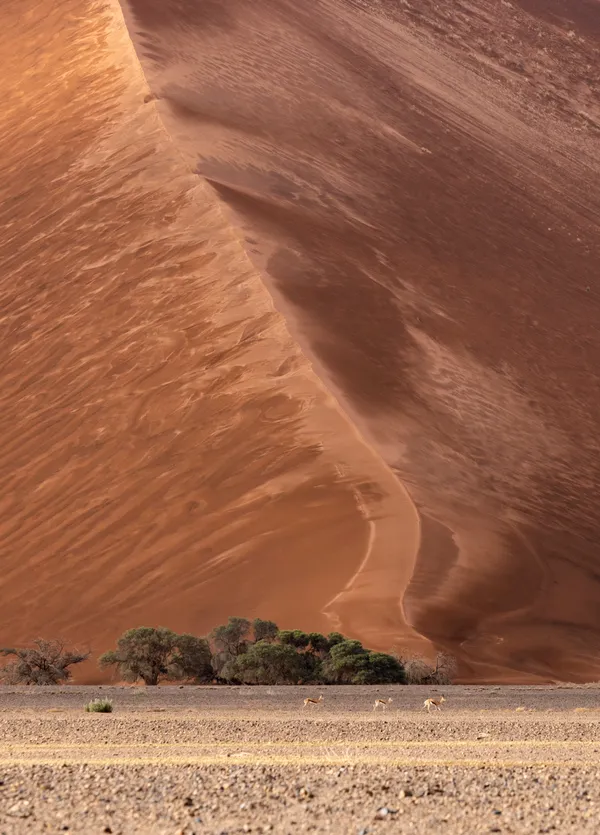
Dune Stop: Dune 40
Dune 40 is located 40 kilometers from the gate, and you’ll find it on your left. It features two unique compositions. For the iconic shot of the single camelthorn tree with the dune spine, drive halfway into the dune’s driveway and stop at a noticeable bump. This gives you a higher vantage point so you can capture the full tree and dune. Step about 30-40 meters to your right (west) for a clear view. Use a telephoto lens (400mm+) and a tripod, shooting in portrait orientation to avoid capturing the sky. Both morning and late afternoon light work beautifully here.
Dune 40’s Hidden Gem: The Dune 40 Ribs
On the western side of Dune 40, there’s a unique formation known as the “ribs.” After sunrise, as the sun peeks over the dune, it casts light and shadow on these sand layers, making them look like ribs with alternating highlights and shade. You’ll also see three trees beautifully illuminated at the same time.
The best spot to photograph this is from the area near the Dune 40 toilets, about 500 meters west. You may need to wait for the light to hit just right, but once it does, you’ll see the ribs come to life. This is one of those special, lesser-known shots that’s well worth the effort.

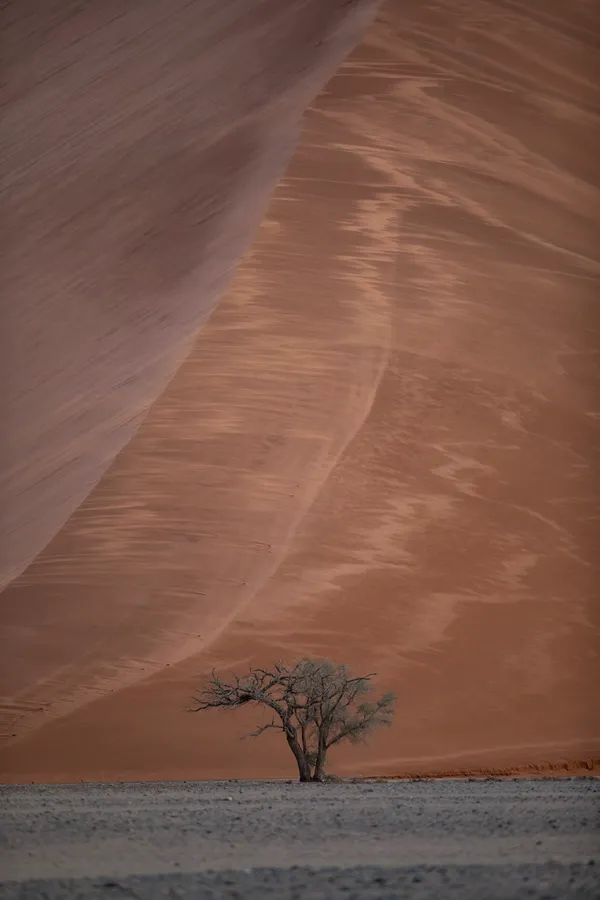
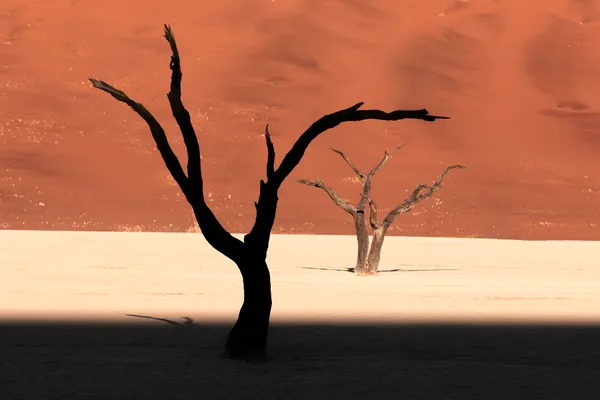
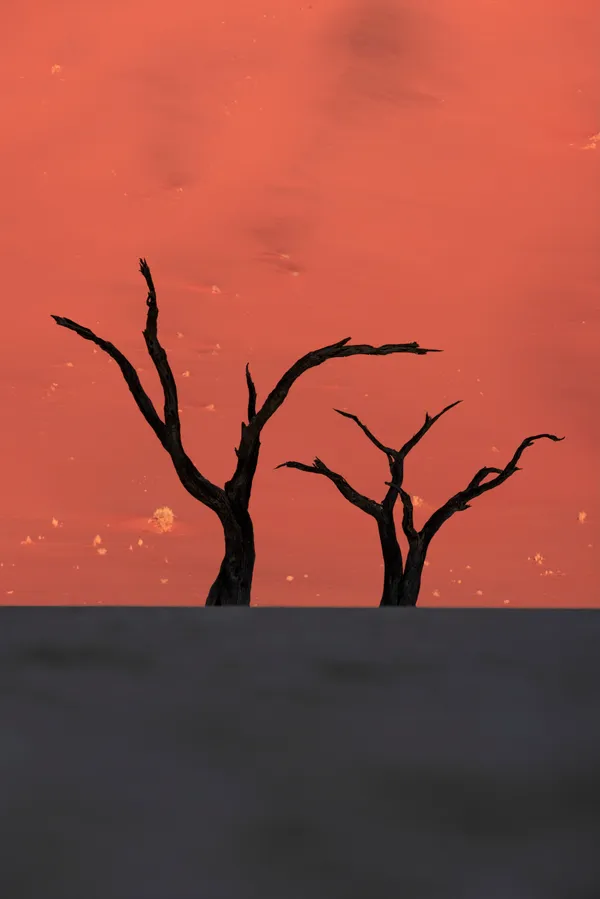
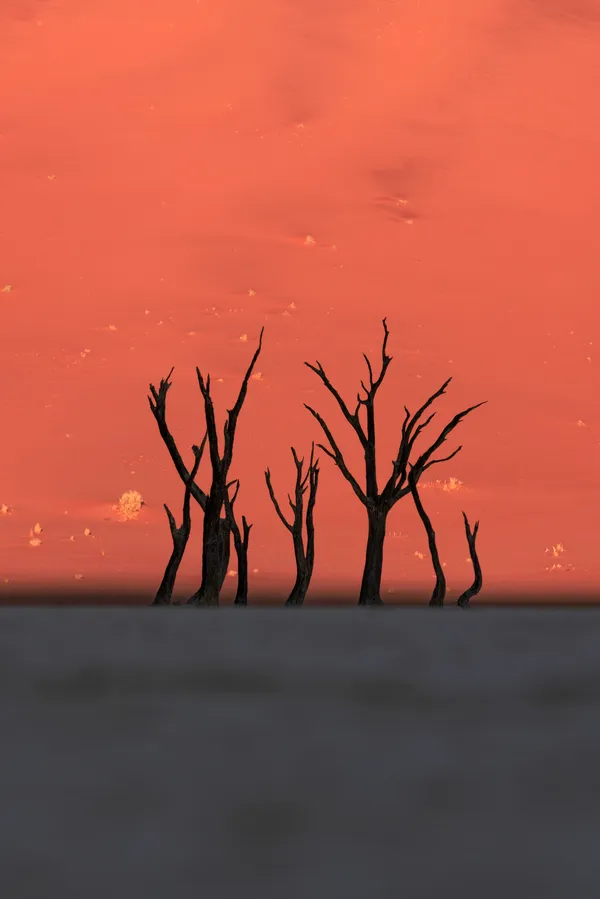
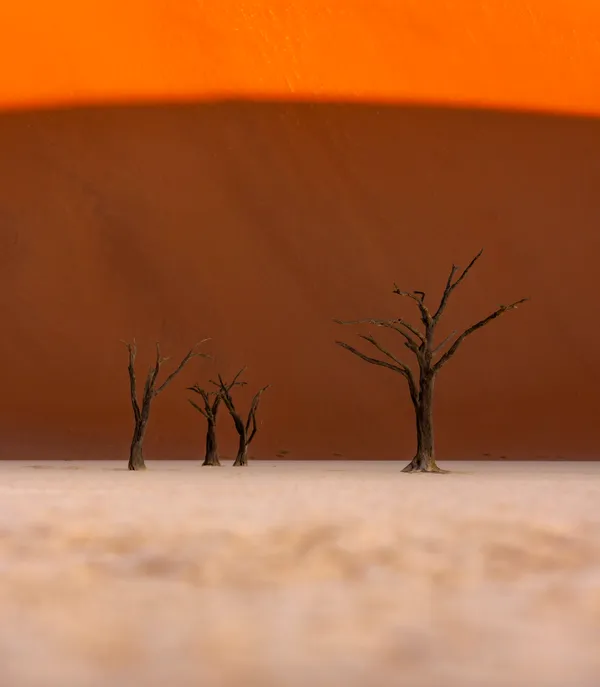
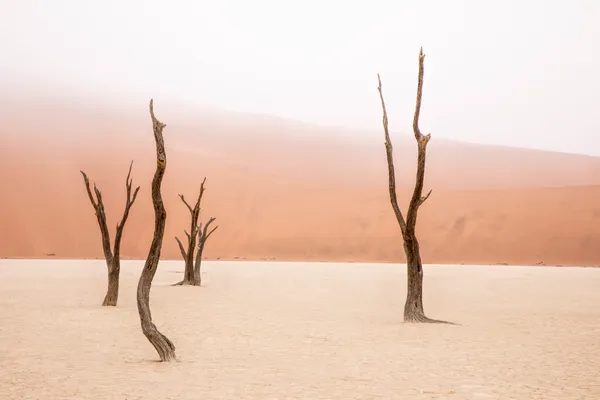
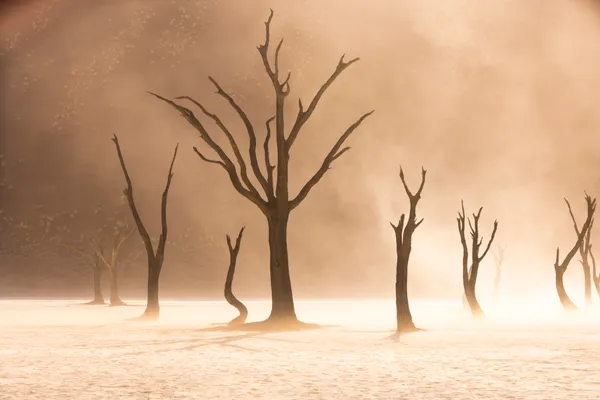
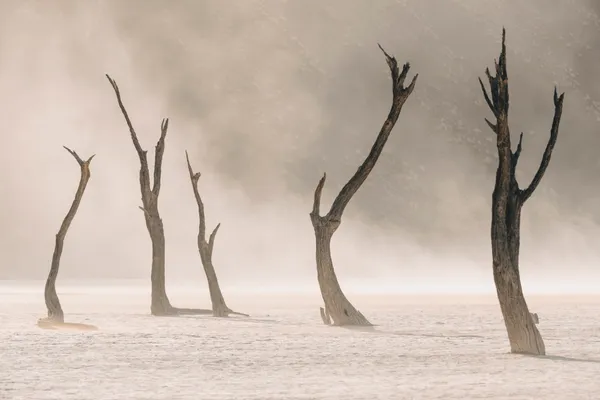
Approaching Deadvlei
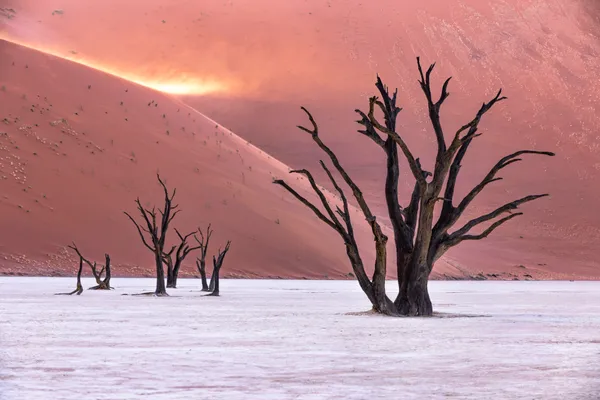
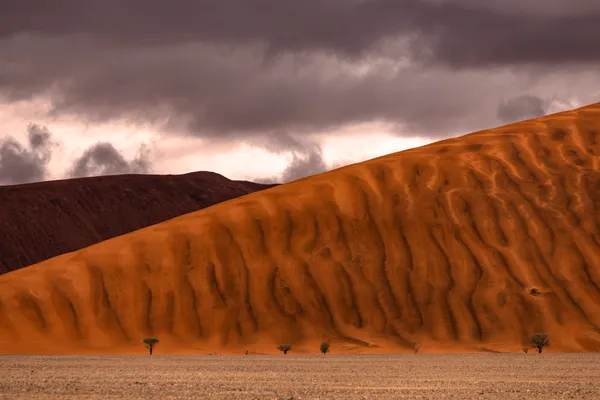
Deadvlei is Namibia’s most iconic scene — a cracked white clay pan surrounded by glowing red dunes, dotted with 600-year-old camelthorn trees that stand like sculptures. The best light is just after sunrise when the dune walls catch the sun but the pan remains in shadow, creating perfect contrast.
Arrive early and walk in from the parking area before the crowds. Stay quiet, move slowly, and look for compositions that layer the black trees against the orange dunes. Use a longer focal length to compress depth and isolate form — this is where minimalism wins.
If you can, stay a little after sunrise; the subtle color shift from gold to deep orange is where the real magic happens.
Deadvlei: Timing, Access & Etiquette
Deadvlei is best photographed in the morning, with a secondary opportunity in the late afternoon. The morning light creates a spectacular show as the sun slowly rises above the dune walls, casting long shadows and warm tones across the pan. The afternoon offers unique compositions and soft color transitions — and the major advantage of having the pan almost to yourself, as most visitors leave by then.
In peak season, up to 2,000 visitors may pass through in the morning, including other photographers. Be patient and considerate — everyone is chasing the same light and silence.
When entering in the morning, drive straight to Deadvlei — do not stop for other shots along the valley. It’s roughly 65 km from the main gate to the Deadvlei parking area, followed by a 1-mile (1.6 km) walk through soft sand into the pan itself. You’ll likely arrive while it’s still dark, but remember: Deadvlei sits in a bowl of dunes, so the sun rises later here. Use that time to explore, plan your compositions, and position yourself before the light touches the dunes.
Photographer’s Approach
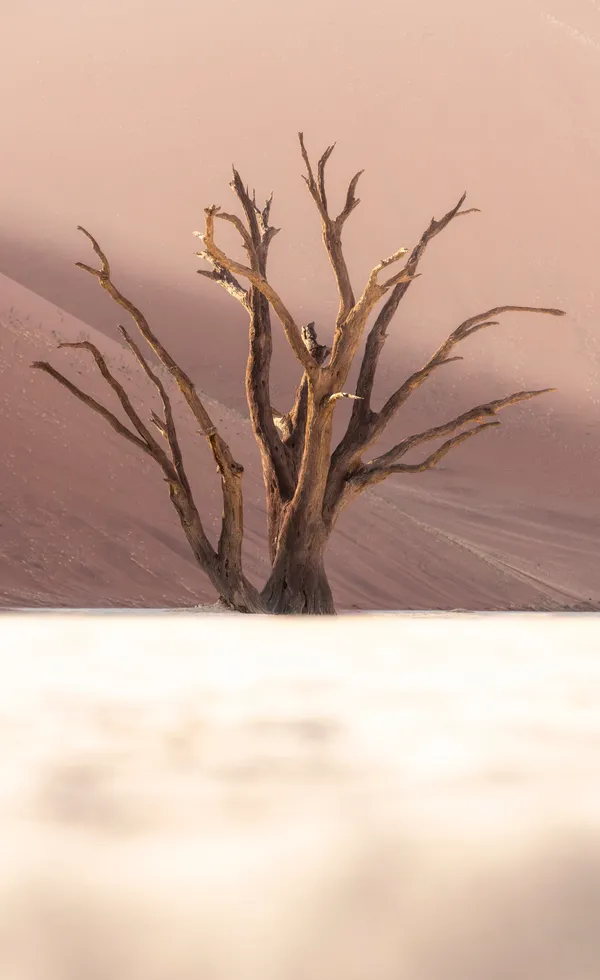
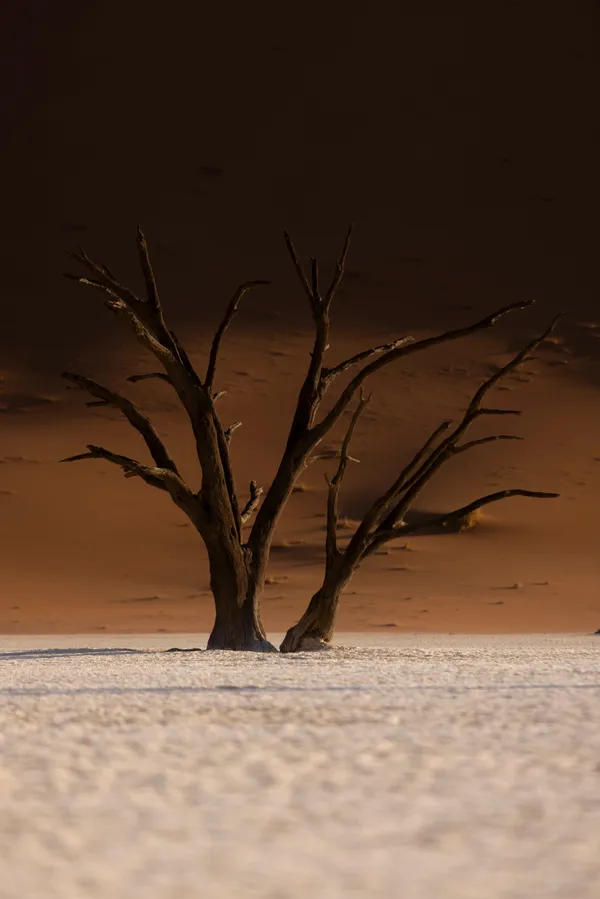
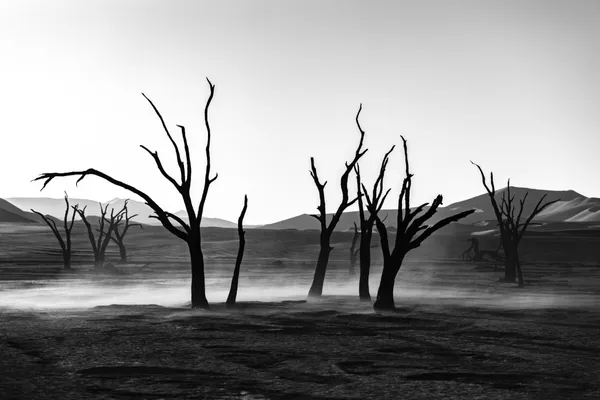
Deadvlei rewards patience and precision. Arrive early to avoid footprints and tourists. Use a telephoto lens (200–400 mm) to isolate tree silhouettes against the glowing dunes. Focus on clean compositions, minimal sky, and strong contrast between shadow and light. The first 30 minutes after sunrise offer the richest color and texture. Move slowly, study the angles, and let the shifting light guide your frame — every minute changes the mood.
Deadvlei: Working with Changing Light
As the morning unfolds, the light moves across Deadvlei from west to east, gradually revealing the pan. You’ll notice a beautiful rhythm of shifting tones — some trees bathed in light while others remain in shadow — and the dunes behind them glowing in rich, changing color.
This is the perfect time to move slowly through the pan, adjusting your position to find compositions where the trees are clearly separated and not overlapping. Use your telephoto lens to compress the background dunes toward the foreground trees, creating depth and drama in your frame. Every few minutes the light transforms, so stay alert and let the scene evolve — it’s these fleeting transitions that often produce the most striking images.
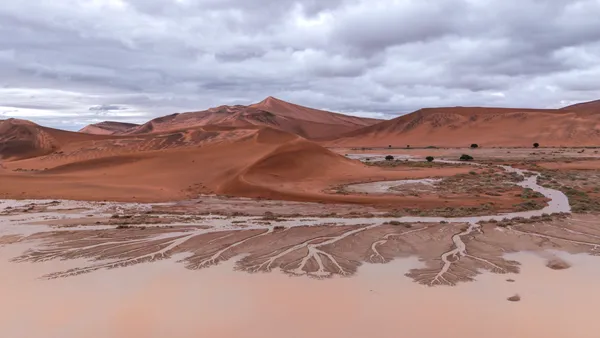
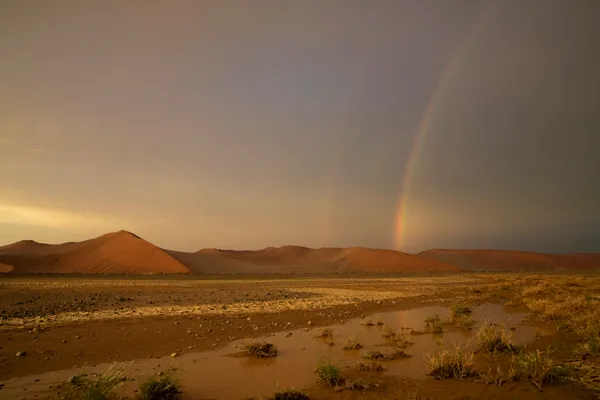
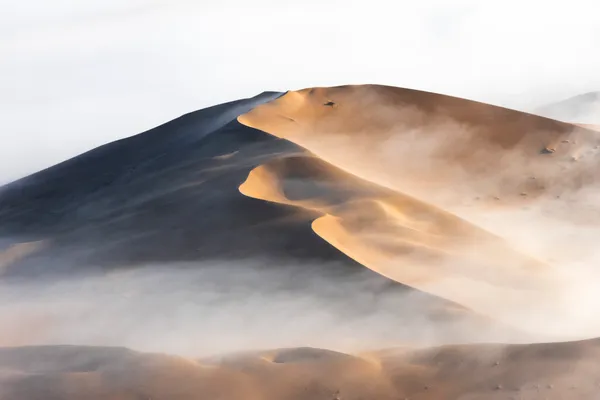
Unpredictable Elements: Weather & Atmosphere
That’s your full guide to photographing Sossusvlei and Deadvlei — but nature always keeps a few surprises. On rare occasions, you may encounter clouds, fog, wind, or even rain in the desert. These moments are fleeting and challenging, yet they can transform your images from beautiful to unforgettable.
If the weather shifts, don’t stay back at camp. Obscure conditions often create the most compelling photographs — soft light through fog, wind-blown patterns on the sand, or dramatic skies after a desert shower. Embrace the unpredictability, protect your gear, and let the desert show you its rarest moods. Those are the images few ever get to capture.

Wil je meer zien?
Ik heb samengestelde kaarten, reisplannen en meer gemaakt voor reizigers die willen reizen zoals ik.

Op zoek naar activiteiten?
Bekijk mijn gids voor de beste gratis activiteiten, plus reisplannen en reistips om je reis onvergetelijk te maken.